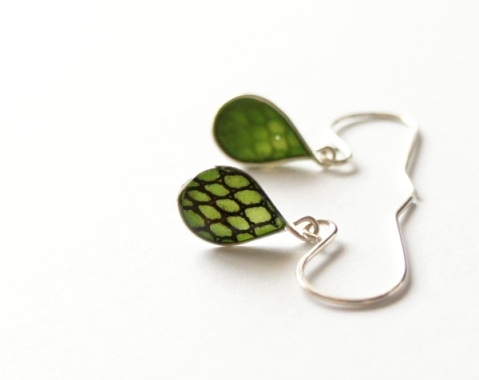
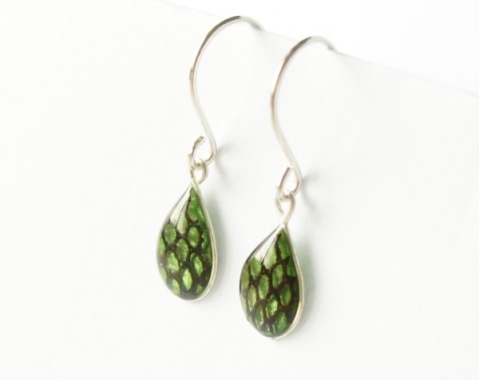
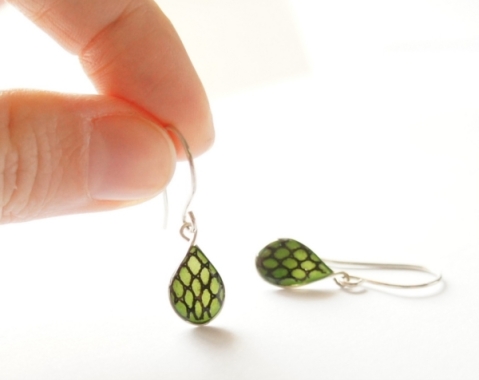
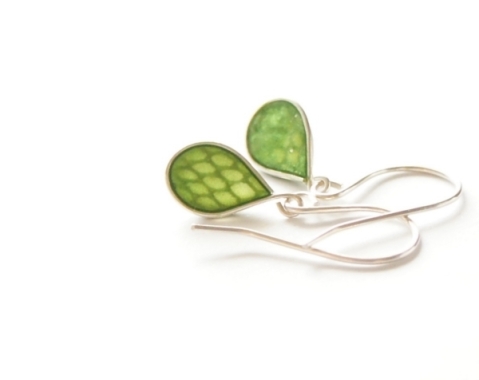
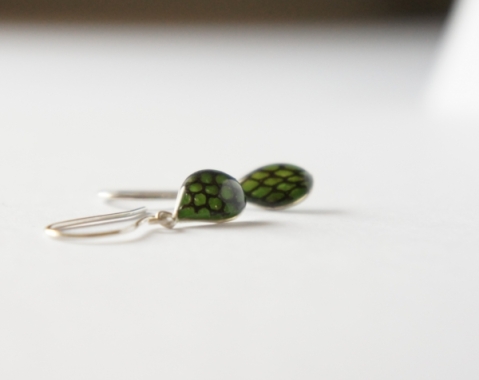
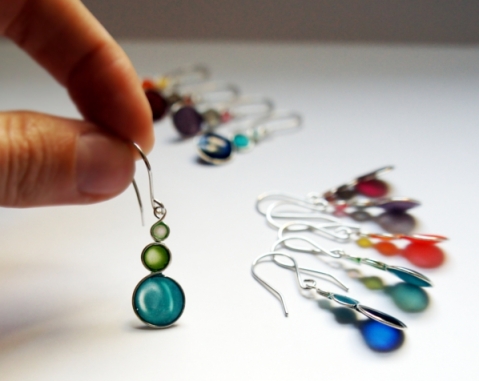
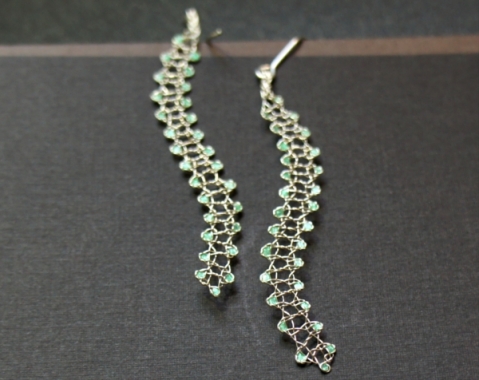
green drop earrings
I finished these earrings back in December but didn’t get to photograph them until yesterday.
The lace is made of chocolate-coloured sewing thread woven into a simple half-stitch ground. I simply love the beautiful contrast of the brown lace against the rich yet fresh grass green background of the earrings.
.
.
.
.
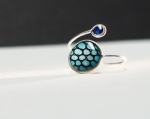
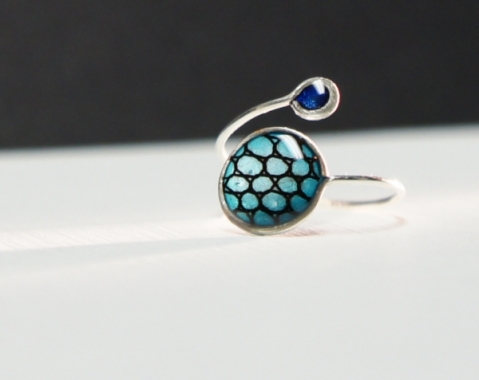
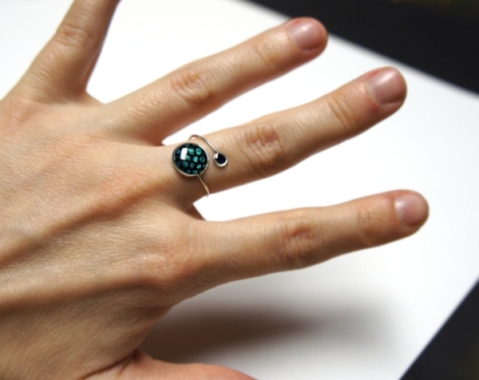
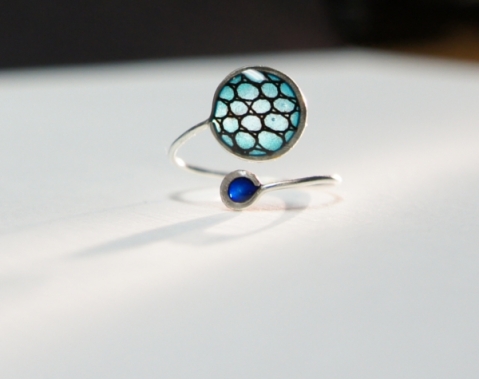
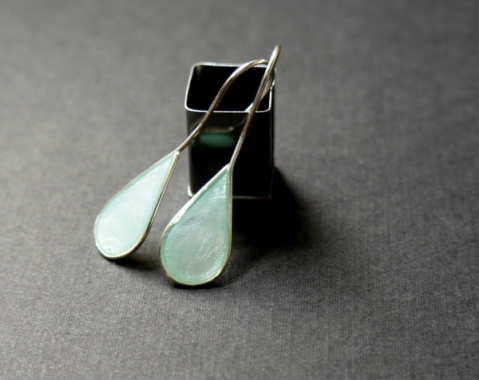
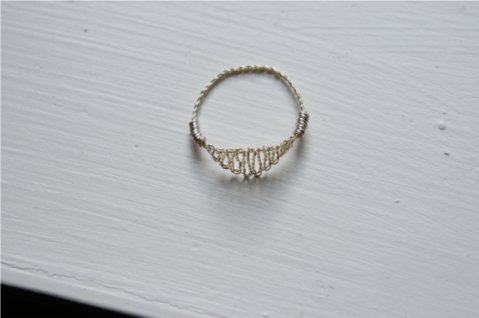
everlasting lace ring in turquoise, blue, and chocolate
In the beginning, there were three seemingly random materials: sterling silver wire, resin, and thread.
The lace-maker in me patiently twisted and braided the thread into a piece of bobbin lace just like my great-grandmother used to.
The eager metal-smith in me carefully shaped and finished the wire to form a durable and comfortable ring base, which the free-spirited chemist in me happily filled with custom-dyed resin.
Where past meets present; where tradition meets modernity; where science meets art — that’s where everlasting lace lives. I love knowing that there’s much more to this minimalist ring than what meets the eye.
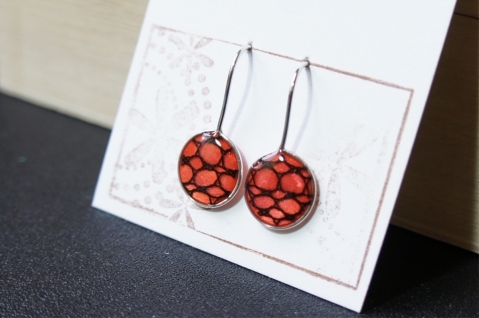
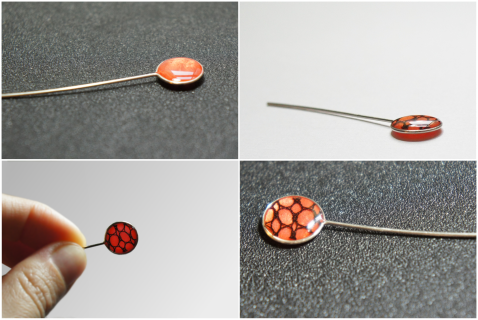
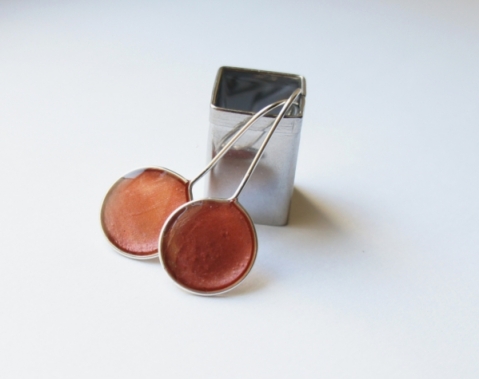
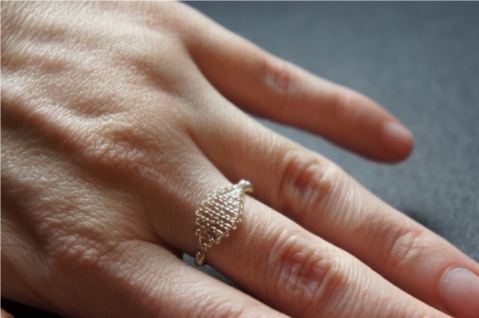
everlasting lace ring in pearl, red, and chocolate
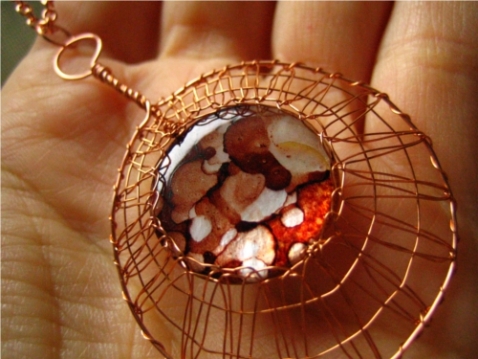
This ring from the Everlasting Lace series features simple round shapes and minimalist lines that guard droplets of colourful resin with an almost microscopic snippet of handmade lace suspended within.


everlasting lace
Simple, colourful resin jewelry.
Handmade, delicate bobbin lace.
What happens when these two media cross paths?
Everlasting Lace is born.
I made the earrings below sometime last October. It was sort of an experiment but it turned out so well that I felt confident giving these to my sister-in-law for her birthday. We aren’t very close and I continue to hope she liked them. Regardless, though – making them was so wonderful! The second I gave them away I knew I’d have to make more.
what’s new?
I’m still twisting wire. I also started playing with colour. And resin.
Less lace, more bubbles.
I certainly haven’t been short on ideas. Just short on time needed to post them. Here’s the best of the last three months.


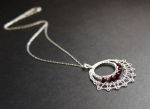
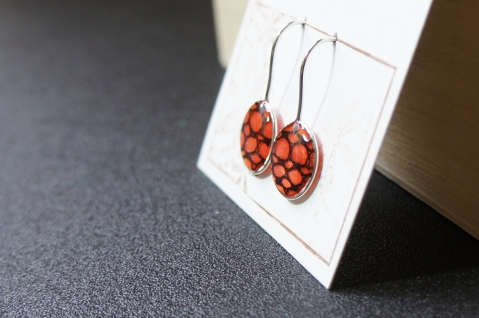
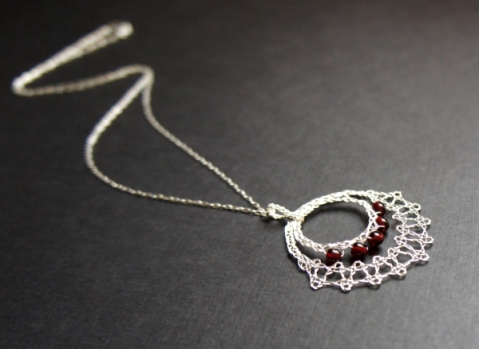
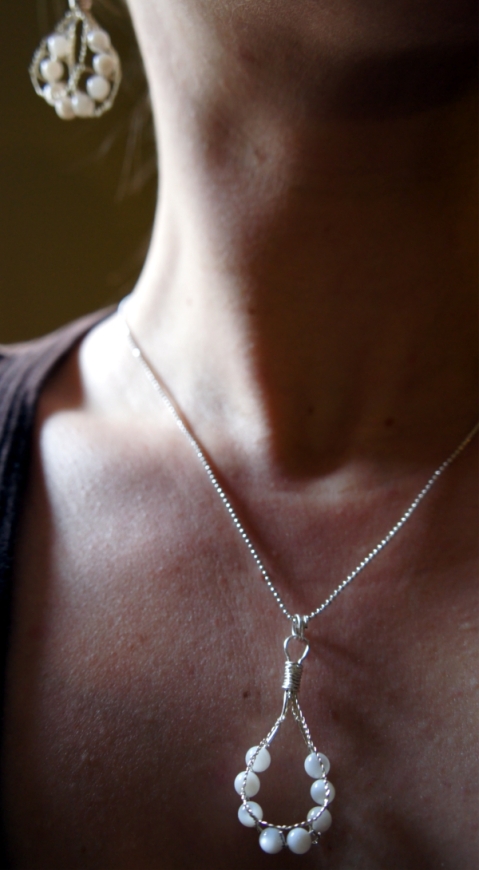
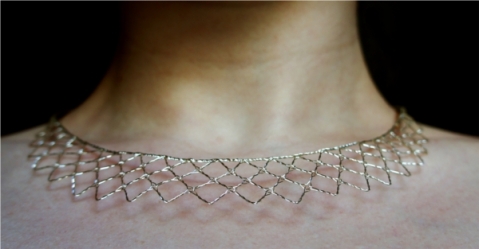
lacey pendant with garnet red beads
Not too long ago, I made and fell in love with these earrings:
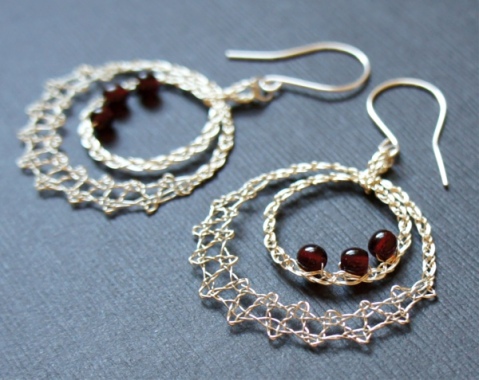
I must confess, though: I was not prepared for the number of compliments I would receive whenever I wear them. It’s exciting and scary at the same time to hear myself respond, “Thank you so much! I made them myself.”
When we visited with our friends a couple of weeks ago, Lesya, our wonderful hostess, was shocked to find out that by “making them myself” I meant weaving and braiding them from scratch, starting with nothing more than a thin wire. Had it not been for her, I would have never realized that there are many people who associate the term “handmade” with a simple assembly of pre-made pieces. Thanks to Lesya, I learned that I need to emphasize the complicated process of bobbin lace making that goes into each piece of jewelry that I make.
“I would love to make something just for you – have a look around my shop, and pick whatever you like,” I suggested like I often do to say thank you to my friends. Deep down I knew that to properly thank her for the magnificent seven-course Ukrainian feast she prepared for us, I probably owed her a diamond tiara. At least.
She got back to me the next week, and said she still liked the earrings I wore to her house the best. She was curious, however, if I could make a pendant using the same design.
Could I?
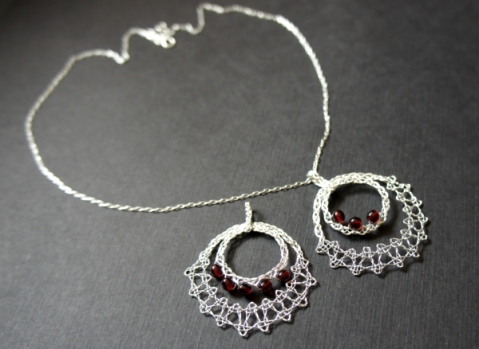
I had been thinking about and planning to make a pendant to match these earrings for weeks! Lesya’s request couldn’t have made me happier. I finally had a reason to make it. I immediately sent her an email with different colour and design choices, and based on her answer, I made this pendant:
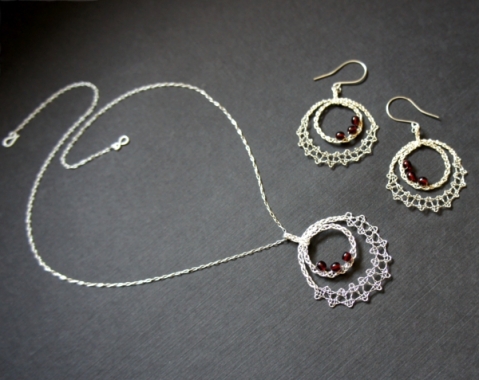
But before I could secretly wrap it and mail it to her as a surprise present the following day, she contacted me again, and asked if I could make her pendant to look just like my earrings. Well, of course I could. And so, in two days, I had two pendants ready, one cuter than the other:
Ultimately, Lesya picked the first one. The original Lesya pendant. I can’t wait to give it to her this weekend at our favourite Indian restaurant.
And what will happen to the other pendant? Well – I will try to find it a good and loving owner. Do you know anyone?
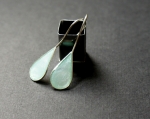
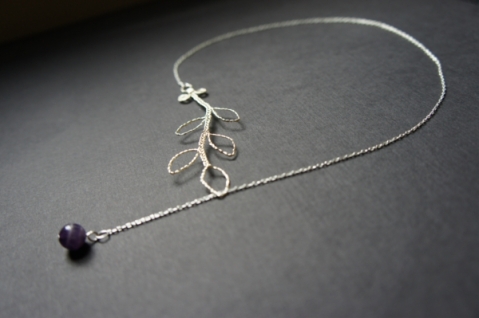
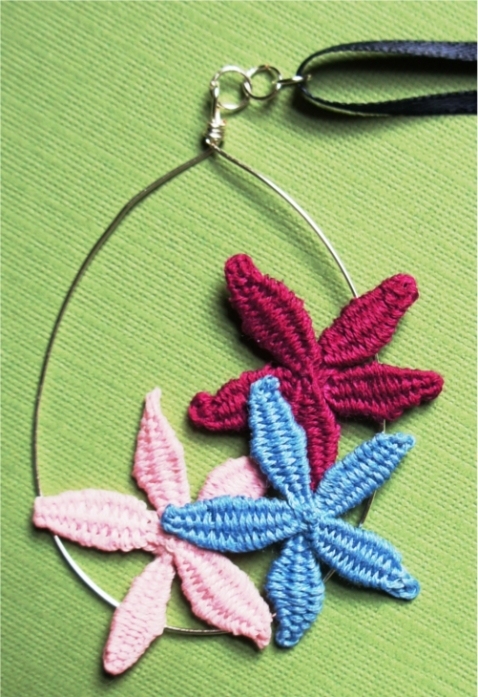
adriatic blue wave necklace
Recently, I have been thinking a lot about the pristine waters of the Adriatic Sea, nestled between the coasts of Italy, Croatia, and Greece.
I remember its surface calmly shimmering in the early morning light and I can almost smell the air already saturated by salty moisture as I spread two beach towels on a narrow pebble beach. The ten days an adorable and intriguing young man and I spent laying there side by side getting to know each other five years ago belong to the nicest memories my now-husband and I share.

I can still hear the soft waves shyly sliding up onto our beach. When you close your eyes, I swear the sound of their subtle yet incessant movement will soon make you believe the sea is alive and breathing right next to you.
Along with sterling silver wire, there are these and many other memories woven into the simple design of this intricate lacey pendant. The brilliant azure, steel and smokey colours of Czech glass beads woven within make the owner feel like she is wearing a piece of the Adriatic right by her heart.

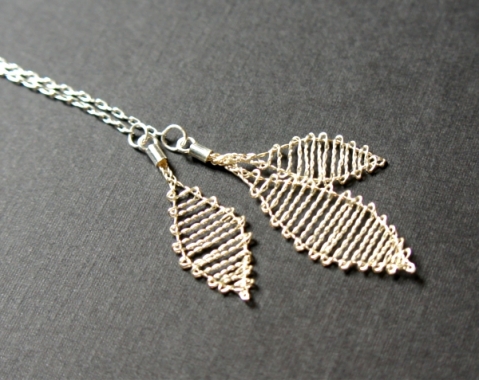
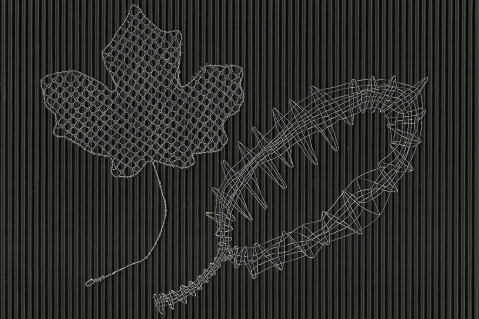
leaf in the rain pendant
I am in love with the romantic feel the combination of braided and twisted lace creates! At the moment, my mind is swarmed with literally dozens of designs I’d like to make. Not to mention, this pendant would look nice as matching earrings, and the earrings I made last week could be just as well be translated into pendant. So much versatility!

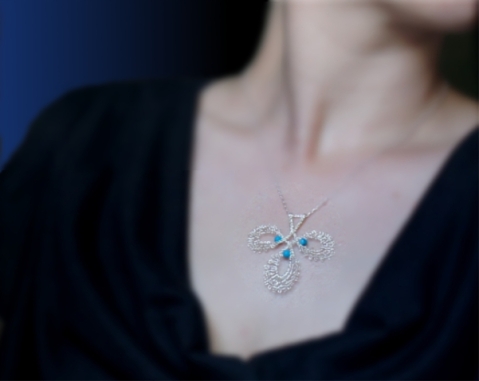
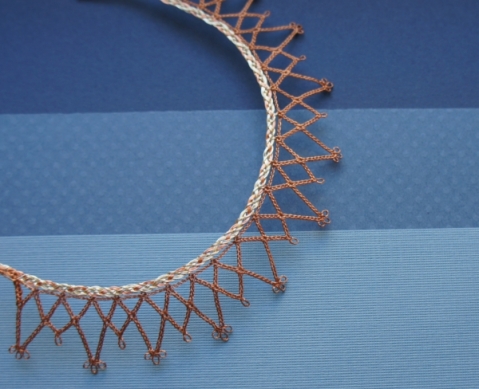
“trikota,” a celtic knot pendant with turquoise
Inspired by the logo of Trikota, a textile factory in my childhood hometown of Vrbove, Slovakia. Enjoy – there is more to see in my Etsy Shop!

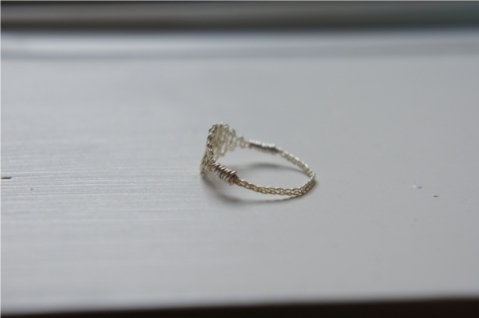
playing with wire: a three-tier royal crown ring on etsy
Check out my newest creation for my Etsy shop.

playing with wire: a beaded set
 Sperky № 006
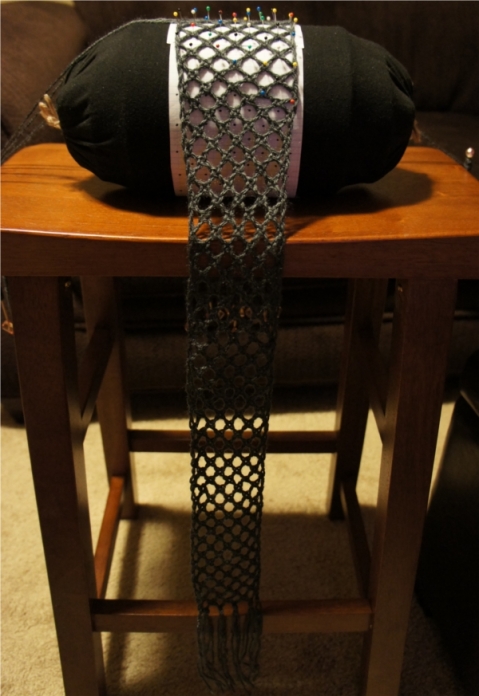
make your own bobbin lace pillow: bolster pillow
I took on bobbin lace-making while living in Korea, out of all places. Far away from home, the Internet became both my teacher and companion.
Inspired by this Russian website (text in English), I made my first bolster pillow using nothing more than a Coke bottle filled with water for weight, batting from an old pillow, and some leftover curtain fabric.
Though it ended up being less than perfect – the amount of batting I had was only about two thirds of what I needed and as a result, the pillow was at places bumpy and soft – I learned many a valuable lesson on it. It also taught me that there is no reason why bobbin lace-making should be an expensive hobby. So far, I have been able to make all that I need (be it bobbins, two bolster pillows or a smaller cookie pillow) with either household items or widely available craft supplies.
I have been using the bolster pillow I made to replace the one I had left behind in Korea for almost a year now, and I love it! It gets its weight from a muslin sack filled with 5 pounds of sand. The core is covered with a single layer of upholstery foam, the edges of which are sewn together. [Had I had more of this foam, I’d have used two layers to end up with a “chubbier” pillow.] The whole thing is furthermore wrapped in 5 layers of black, denser foam sheets. To protect the foam and to provide a washable working surface, the final layer is made out of black knit case, ends of which are firmly tied together.
While the sand makes this pillow really sturdy and stable, it needed a stand that would prevent it from rolling over. Back in Korea, I was using a stiff wine set gift-box and loved it so much that I made my new pillow fit a shoe box I wrapped in some leftover fabric. The box provides just enough support, and stays put not only because of the weight of the pillow, but also thanks to non-slip drawer liner attached to the bottom of it.
To make your own bobbin lace-making pillow, you will need:
- thread, needle, safety pin, sewing machine
- muslin
- 5 lb of sand
- 0.5-inch upholstery foam
- artistic foam sheets
- knit fabric
- string or ribbon
Process:
- Sew a muslin sack to fit a shoebox you want to use. Leave a small opening in one corner.
- On the opposite end, fold both ends over and stitch them together to create a flat bottom.
- Place the sack flat-side down in a mug to keep it stable. Through the opening in the seam, fill it with sand.
- When the sack is packed full, stitch the opening shut.
- Create another flat end by sewing the corners on this side together.
- Measure a rectangle piece of upholstery foam big enough to wrap around the sack. Sew its edges together.
- Wrap the upholstery foam in several layers of denser foam. Test the thickness by pushing a pin through the layers – you should not feel the sand even if the pin is pushed all the way in.
- Sew a knit fabric tube that fits snugly around the pillow. Fold the fabric and create casings on both ends.
- With a safety pin, insert a ribbon through the casings. Tie the ribbon on one end firmly into a knot. Insert the pillow, and tie the other ribbon into a double bow (use this end to wash or replace the cover, when necessary).
- Use your bolster pillow supported by a shoebox. For increased stability, staple or glue a non-slip drawer liner to the bottom of the box.


torchon grid
Note: Written in Seoul in 2009
Another step was making the grid. Though the construction paper seemed to be working, I wanted something that would last a bit longer. So, I gutted a project folder and used the plastic cover.
To make the Torchon grid, I simply punched holes through the plastic laid over the graph paper with a ‘primitive’ pricker I made using a needle super-glued into a chopstick.

make your own bobbins II.
Note: Written in Seoul in 2009
Well, it’s been a busy week. Working in a foreign country, having no locals to ask for advice, and facing a serious language barrier (my knowledge is limited to a few words describing food I like to order when there is no picture menu to point to), I have still managed to create the absolute must-haves if I want to continue learning how to make bobbin lace.
I also realized my practice might be limited to the number of bobbins I own (I made 6 pairs only – making them out of chopsticks was ingenious but a bit time-consuming and, well, it gave me blisters). So I was thinking long and hard about how to make bobbins quickly, easily, and most importantly, without breaking the bank.
All I had to buy were skewers. The rest – superglue, and two kinds of beads – I already had at home. The project was super easy, super quick, and dare I say – the bobbins look awesome!


Here’s how to:
- Cut the skewers into 4 1/2 in (12cm) pieces.
- See if you can bead the skewers. If yes, go to step 3. If not, sharpen both ends into points with an X-acto knife.
- Add a drop of superglue into the smaller of two beads and attach it to the skewer. Repeat on the other end, with the larger bead.
- Let the bobbins dry for at least an hour before starting to use them.
Note, September 26, 2010:
I made 50 pairs of these beaded bobbins last year. I am yet to work on lace that would require that many – but a year and a half and many projects later (including wire lace), I still have all of them. Considering how economical and easy they were to make, they seem indestructible. If you are only learning, or are working with a limited budget, I really recommend you make your own bobbins. I guarantee you will not be disappointed.


JaKiGu on Etsy